Follow the complete workflow from a research brief to a tested study ready for fieldwork.
This guide takes you through the shortest complete route to fieldwork. You will create a questionnaire, review it, define the audience, test the participant journey, and submit the study for publication.
Prepare the research decision, audience, and supporting brief. You need permission to create and edit a study.
1
Create the study
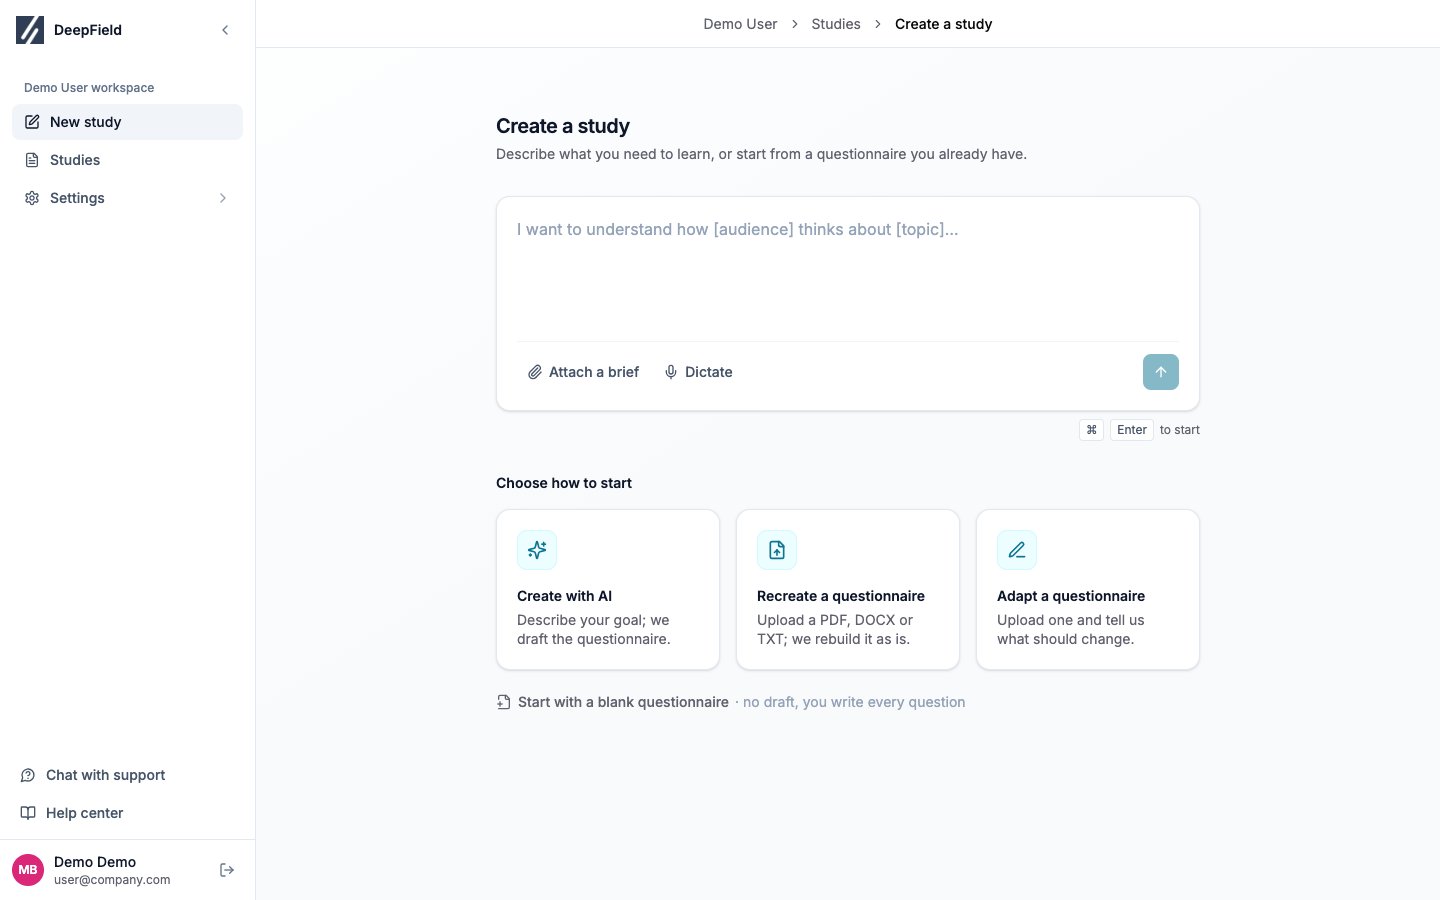
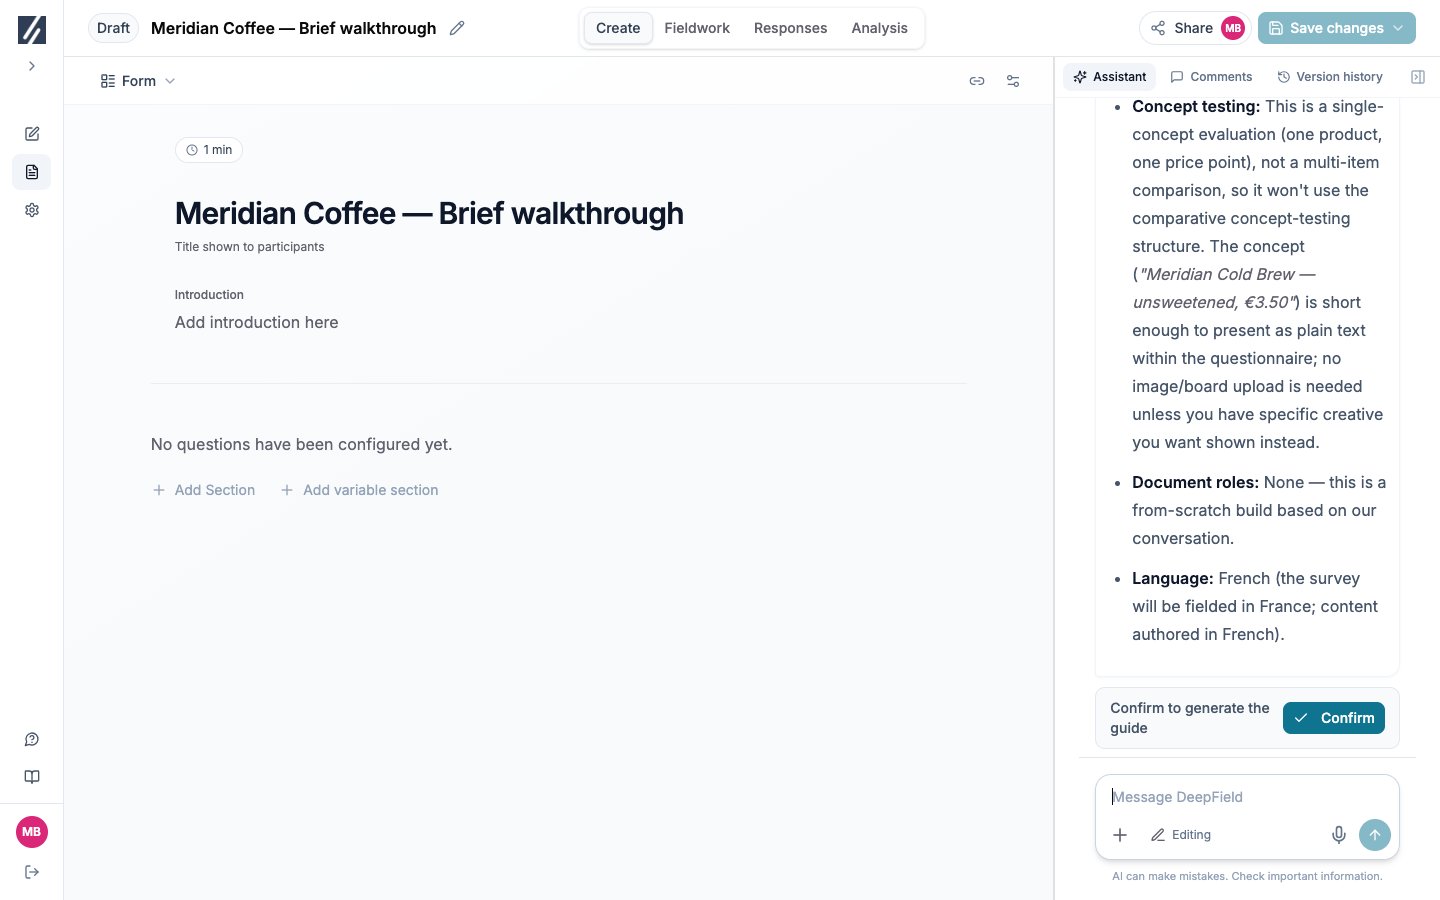
Select New study. Describe the audience, the decision the research will inform, and the questions you need the study to answer. Use Attach a brief to attach supporting material such as a brief or an existing questionnaire.If you use the assistant, review its brief summary and select Confirm when it matches your intent. Correct details in the chat before confirming.Select Start with a blank questionnaire to configure every question yourself. Use Recreate a questionnaire to reproduce an uploaded questionnaire, or Adapt a questionnaire to specify changes to it. See Start a study for all four paths.
Describe the research or choose a creation path in New study.
Check the summary, correct any missing details in chat, then confirm generation.
2
Review the questionnaire
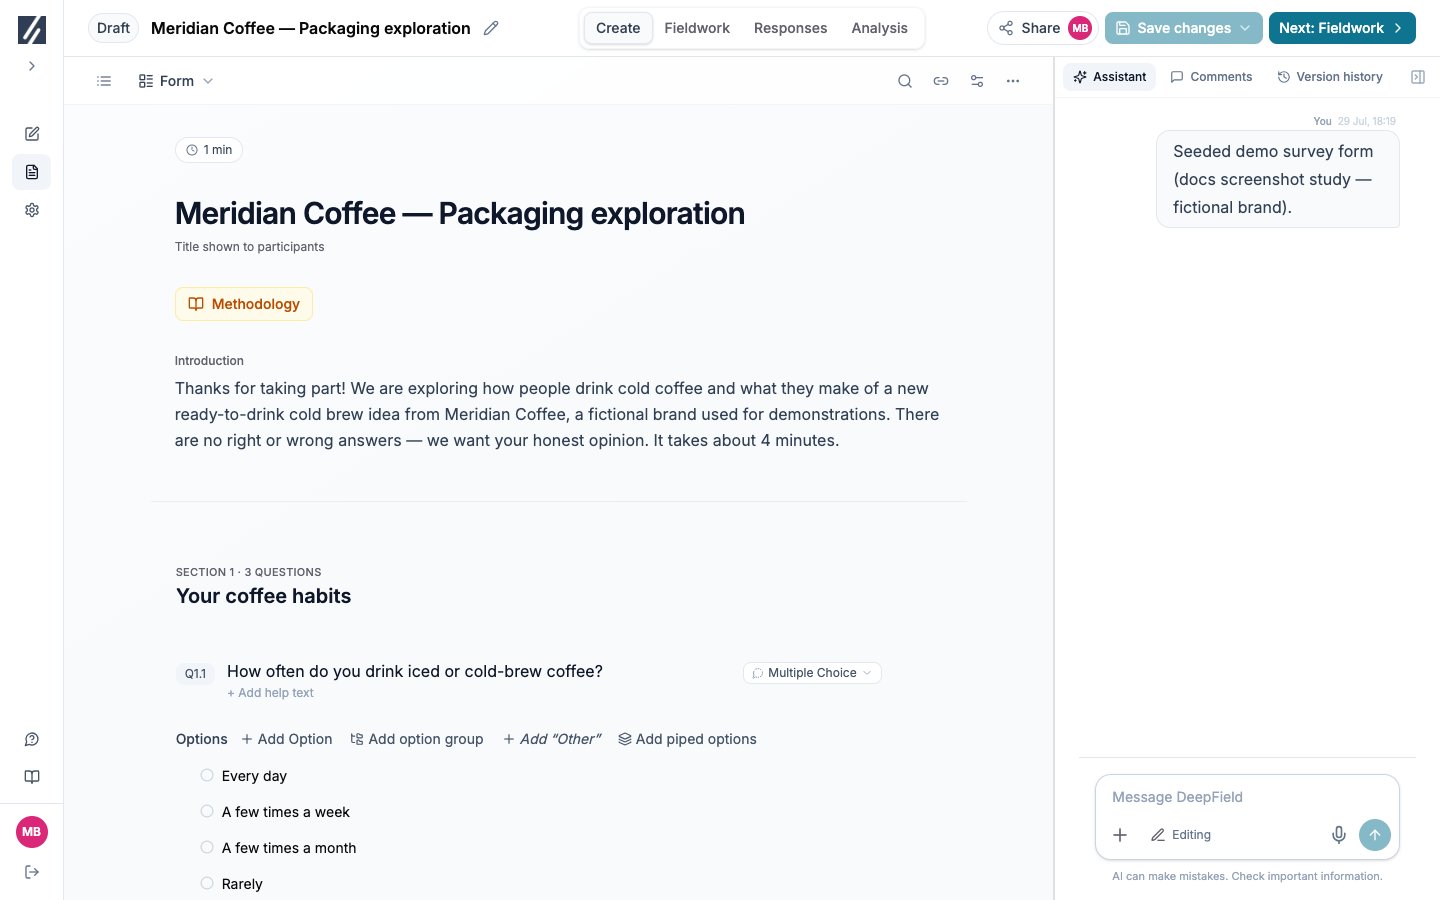
When the draft opens in Create, read the introduction, sections, questions, answer options, and logic. Select text to edit it directly. Use a question’s ⋯ menu for its settings, and drag questions or sections to change their order.Use the assistant for changes that affect several parts of the questionnaire. For example: “Move the pricing questions into a separate section and add a purchase-intent question after the concept.”
Review the draft question text, options, and section order.
3
Resolve problems and save
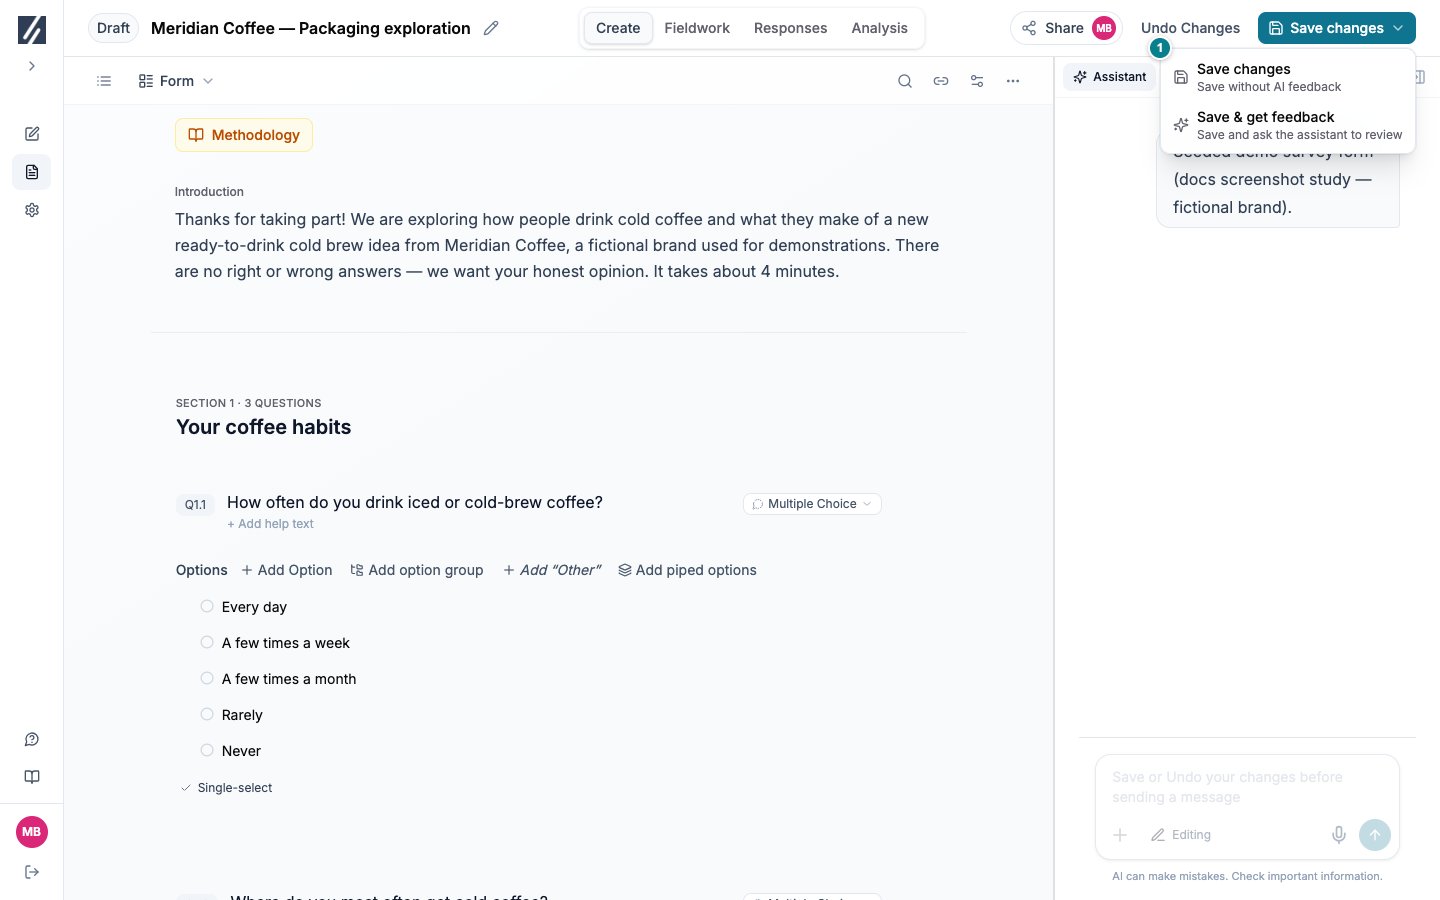
If the toolbar shows a red Fix problems control, open it and select each item to move to the affected question. Resolve every blocking problem before saving.Open Save changes and choose either Save changes or Save & get feedback. The second option saves the current version and asks the assistant to review it. See Edit your survey and Fix survey problems.
Choose an action inside the Save changes menu.
4
Define the audience
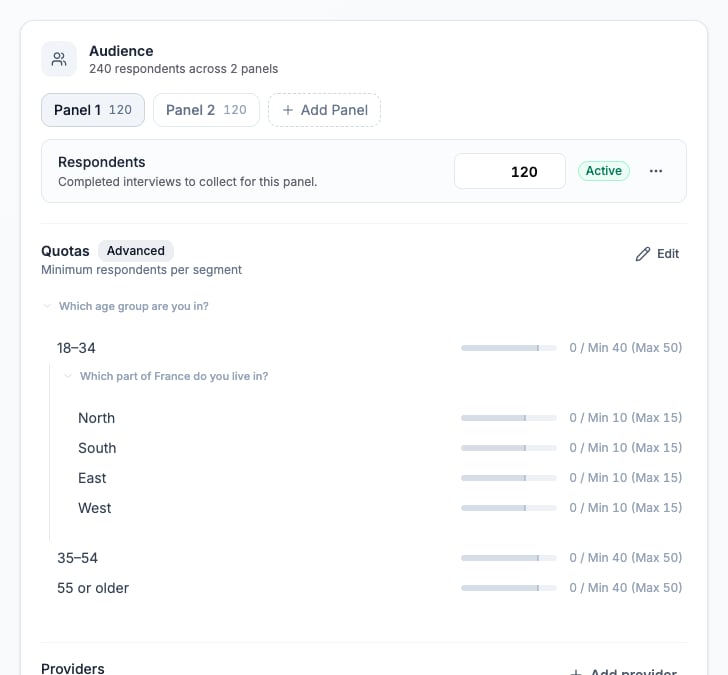
Open the builder view menu and select Quotas, panels & links. Set the respondent target, then add screening questions and quotas required by the sample design. Specify geographic eligibility in the brief, screening rules, and provider instructions.Review Sample size in the panel view, then open Fieldwork for the cost and launch summary. Return to Quotas, panels & links if the target or audience criteria need to change. See Configure your audience, Screen participants, and Set quotas.
Set the respondent target and review the selected panel’s quotas.
5
Test every route
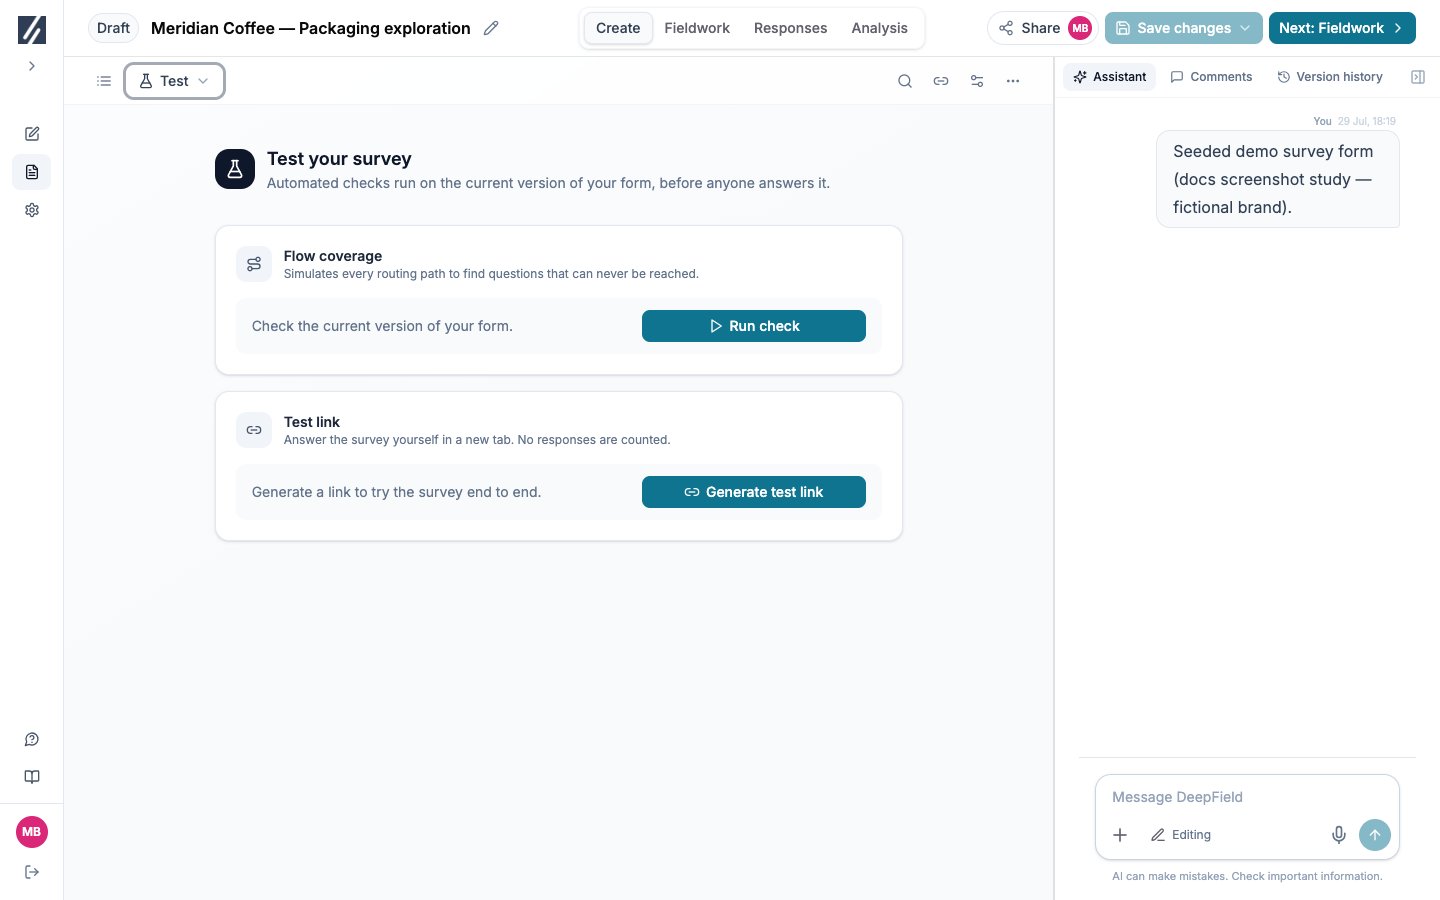
From the builder view menu, select Test. Run Flow coverage, then select Generate test link. Open the link and complete the survey as a participant. Test at least one qualifying route and each screen-out or early-end route that matters to the study.
Saving a change after a test link has been generated displays Disable Test Mode?. Confirming returns the study to Draft and invalidates the existing test links. Generate and share a new test link after the changes are saved.
Run Flow coverage and generate a participant test link.
6
Publish the study
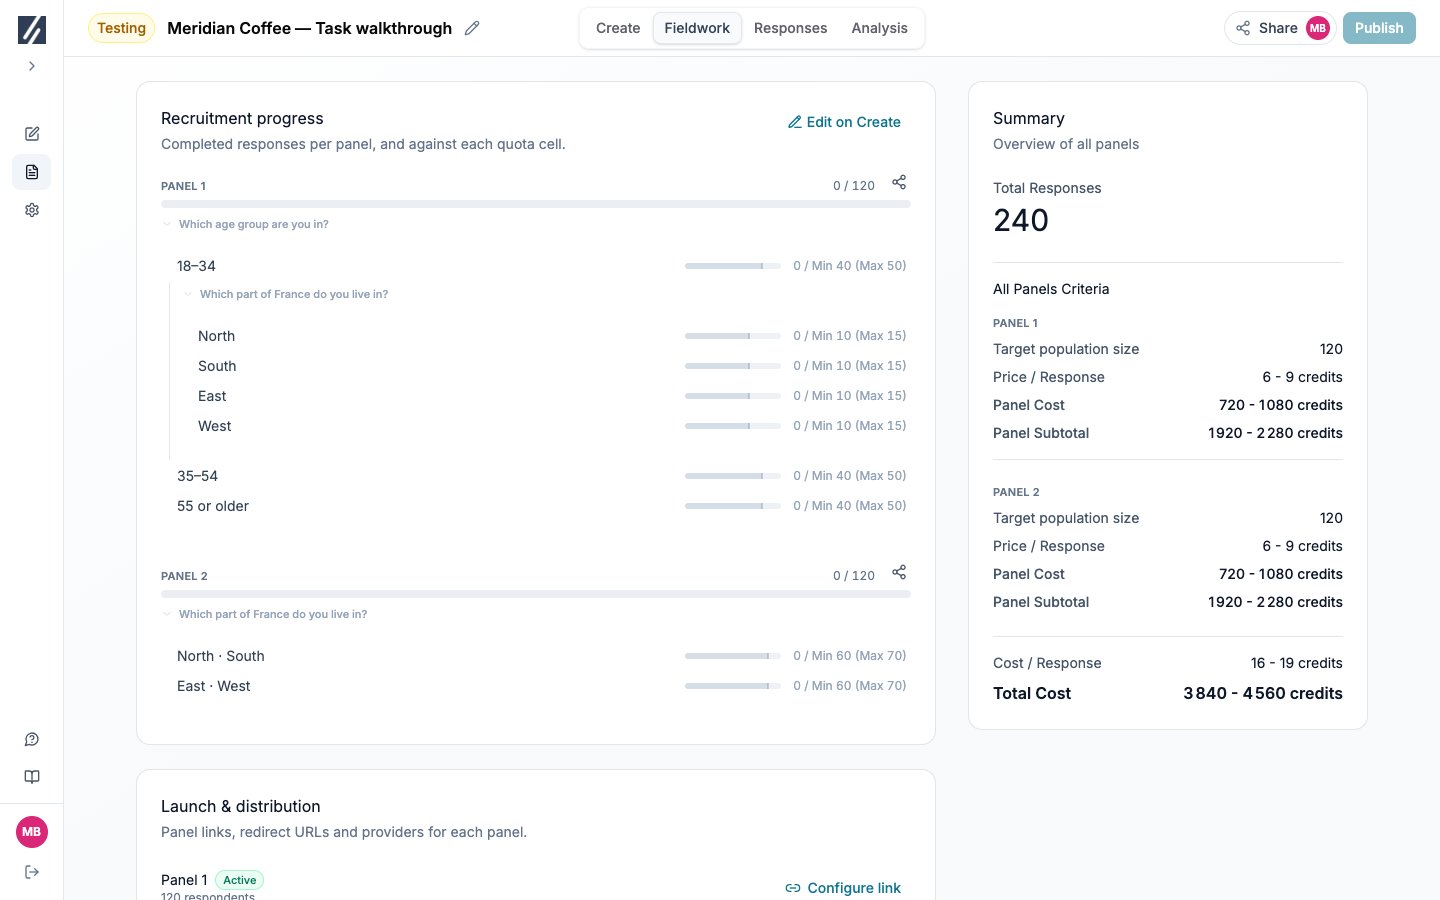
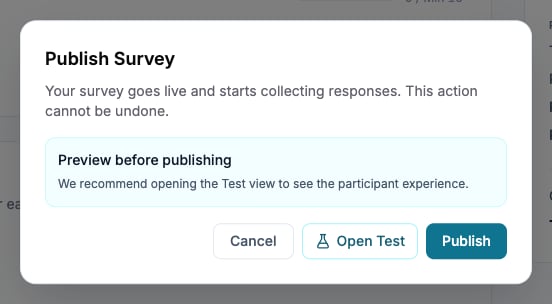
Open Fieldwork, review the launch information, and select Publish. Confirm the submission when the audience, questionnaire, translations, and test results are ready.Confirming Publish moves a Draft or Testing study directly to Published, where it can collect live responses. See Test and publish a study.
Review recruitment progress, distribution controls, and the cost summary on Fieldwork.
Review the final confirmation. Open Test if a participant route still needs checking.
Use Fieldwork to follow recruitment and Responses to inspect completed, screened-out, and partial submissions. Prepare an analysis plan before collection. When eligible responses meet the generation requirements, use it to generate the plan folder of charts and tables, then build a deck from a folder of verified charts.
Confirm the saved questionnaire matches the brief, each important test route reaches the intended outcome, and the study is Published before live recruitment begins.