
Start with the research decision and the audience you need to understand. The creation routes all open the same study builder, where you review, edit, save, and test the questionnaire.

Open study creation

Select New study in the sidebar or from Studies. The Create a study page contains an objective field and the creation choices. Returning to this page starts a fresh request; reopen an existing study from Studies to continue its work.
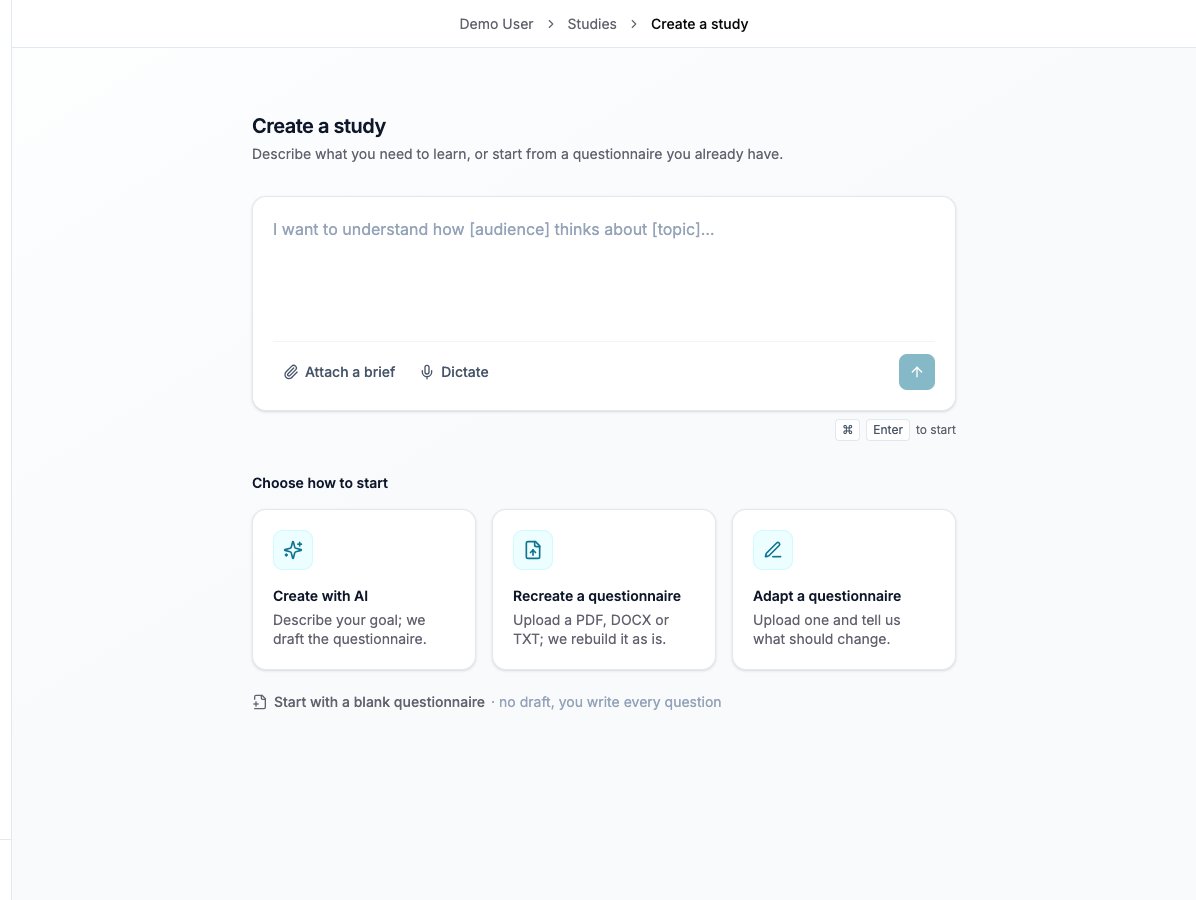
Choose a brief, an existing questionnaire, or a blank form to start the study.

Choose a brief, an existing questionnaire, or a blank form to start the study.

Build from a brief

1

Describe the objective

Explain the decision, audience, required measures, and practical constraints. The Create with AI card focuses the objective field.
2

Attach supporting material

Use the attachment control or drop documents onto the composer. You can also dictate; the transcript is added to the text already entered.
3

Start the study

Select the arrow labelled Start study. Review the assistant’s questions and brief, then select Confirm when the proposed scope matches your research.
4

Review the draft

Read every section, question, option, and rule in Create. Correct the draft and save it before testing.
For example: “Evaluate the Meridian cold-brew concept, including coffee habits, concept appeal, purchase intent at €3.50, and reasons for rejection.” Specify eligibility and intended reporting groups before the assistant programs the questionnaire.

Recreate or adapt a questionnaire

Each upload dialog starts with an empty file list. Its files and instructions are separate from the objective composer. After generation, compare the questionnaire with the source, review any differences the assistant identifies, and test the resulting routes.
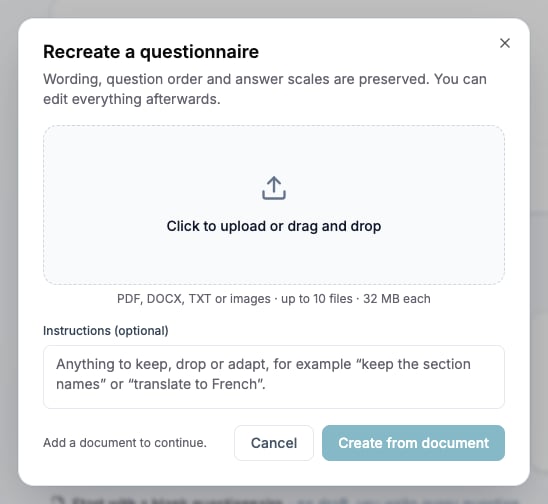
The recreation dialog keeps its source files and optional instructions together.

The recreation dialog keeps its source files and optional instructions together.

Start with a blank questionnaire

Select Start with a blank questionnaire below the creation cards. The study opens directly with an empty questionnaire. Rename it in the study header, then add the sections, questions, screening, and panel configuration yourself.

Attach files

Study creation and the builder chat accept up to ten files, each up to 32 MB: PDF, DOCX, TXT, PNG, JPG/JPEG, GIF, and WebP. Remove files that are not needed for the task. These upload rules differ from the analysis and Plan conversations; see Use supporting material. A file in the assistant conversation is reference material. To display it to participants, attach it to the relevant question and test its participant view.

Refine the questionnaire

Ask for a concrete change, such as moving price questions into a separate section. Review additions, edits, and removals before saving. The assistant’s output remains subject to your review. Use the composer’s editing parameters to request an assessment without changing the form, or restrict changes to selected sections and questions. Check the scope shown above the message before sending it.

Resume an interrupted build

Generation continues on the server. Reopen the study after a reload or connection interruption and allow the current run to reconnect. Messages sent during a run wait for it to finish. Use Stop when you need to end it, then inspect the saved work before requesting a continuation. Editing an earlier message, regenerating it, or reverting to an earlier conversation point changes the later history. Copy any content you need before confirming.

Check the result

The saved draft measures the agreed research questions. Reopen it, check its version history, and test each material route before publication.